If you are setting up Dynamics Marketing Capture Forms for the first time and find it confusing, you are not alone. I have been working with Dynamics Marketing Capture Forms for a while now, but distinctly remember the challenges I had to work through when setting it up for the first time.
Follow the steps I have outlined below for a less confusing and frustrating experience than I had the first time I set up a Lead Capture Form.
First off, Marketing Capture Forms allow organizations to create Leads in Dynamics based on data entered on a landing page on a company website. Contact data is entered on the web page which then triggers Dynamics to create a new Lead.
To begin with we need a landing page on a website with Lead data collection fields. Once you have at least one landing page you can start to configure Marketing Lead Capture to gather data and create Leads. This is an example of a basic set of fields to capture Lead data from a web page.

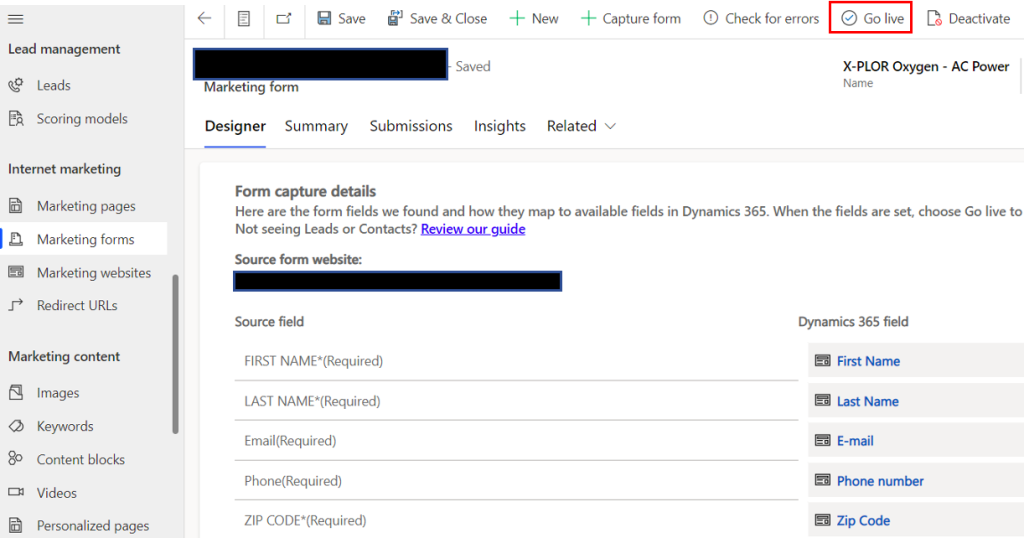
After you have a landing page on a website for capturing Lead data then you need to configure a Dynamics 365 Marketing Form to create new Leads based on these submitted fields. In the Dynamics 365 Marketing app go to Outbound Marketing>Internet Marketing>Marketing Forms and create a new Capture Form.

Enter the URL of the landing page where Lead data will be entered. If you have multiple landing pages for collecting Lead data then you will need a separate Marketing Lead Capture form in Dynamics 365 for each unique landing page URL.

There is an HTML script that needs to be in the Landing Page code, this sends the Lead Data to Dynamics 365. When creating a new Lead Capture Form you will need to use the “I need a new script” choice to generate a unique “Form capturing script”. Use the Copy Script button and paste it into the Landing Page HTML.

After the Tracking Script has been applied to the Landing Page HTML then Dynamics 365 Marketing will recognize the script. You can then move on to choosing a Lead capture form and mapping the fields from the landing page to Dynamics 365 Marketing.

There may be multiple forms on the Landing Page, you want to select the form with the Lead capture data fields. You can see a preview of the available fields to make sure that you are selecting the correct form.

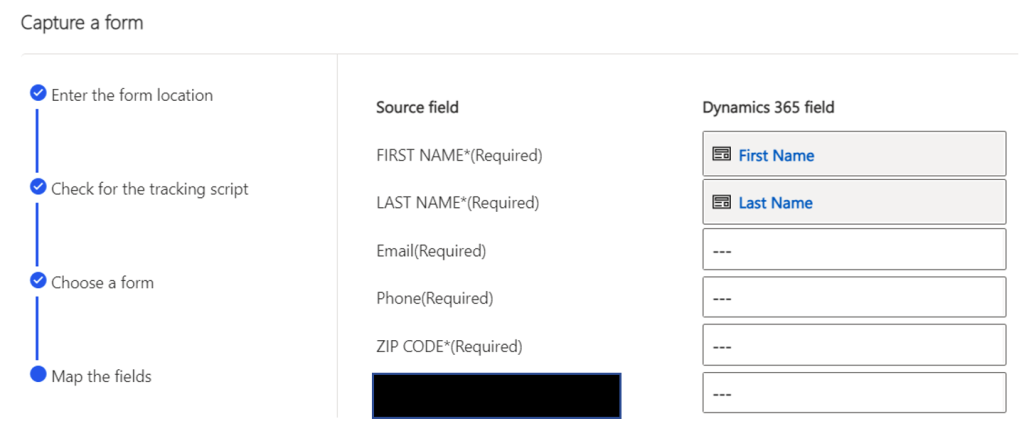
You will then need to select the correct Dynamics 365 Lead fields that match the fields found on the Landing Page.

After you Save and Close the Lead Capture form you will need to reopen the Marketing Form, double check that the fields are mapped correctly and choose Go Live if everything is good.

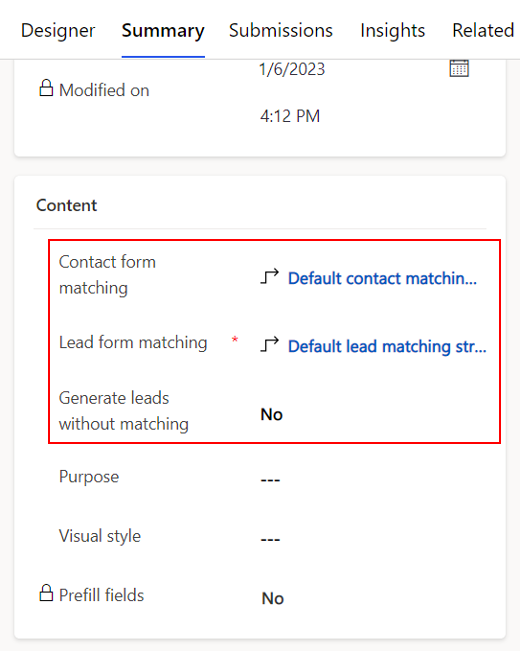
You now have a working Dynamics 365 Marketing Lead Capture form that is sending new Leads to the Dynamics 365 dataverse. There is other functionality that you need to consider to prevent duplicate records and get Insights to how the Capture form is being used. First off you need to decide if you want to prevent duplicate records when records are being created. You can set the duplicate detection rules and activate the rules from the Summary tab.

Lastly you can see an Overview, list of Submissions or list of Visits to the Lead Capture form, from the Insights tab.

Those are the main features of Dynamics 365 Marketing Lead Capture form functionality. I hope that this helps clarify the topic and eliminates the trial and error process that I went through the first time I configured a Marketing form.


